|
Category Archives: Recipes
When I was a little, we spent every Christmas Day at my Grandma and Grandpa’s house. My Grandparents’ house was always warm and cozy, and always smelled slightly smokey due to the firelplace and woodfire stove. The house seemed huge to me, the Christmas tree was always over-lit with hundreds of white lights. My Grandma made Christmas elegant; she was an elegant lady. Their little kitchen island always boasted an array of snacks and treats… Almond Roca, my Grandma’s caramels, cookies from Grandpa’s favorite bakery. Come to think of it, I’m sure there were savory snacks as well but I inherited my Grandpa’s sweet tooth so I only had eyes for things dusted with powdered sugar.
There was always a nice Christmas dinner, usually consisting of a roast (expect for when I was a vegetarian and my well-intentioned Grandma made a ham, “Honey, I know you don’t eat meat so I made you a ham.”), a green salad with Grandma’s ketchup-and-vinegar dressing, and various classic sides. Dinner was lovely but I couldn’t wait for dessert, more specifically for Grandpa’s “famous” apple pie.
Grandpa’s pie was tart and sweet, with apples sliced so thinly they practically melted in your mouth. Their oven was old, electric, and very small, and the bottom of his pies were always coated with a thin crust of caramel, something I haven’t been able to replicate despite years of trying. His crust is rolled so thin you can see through it, using only one pie crust recipe for two pies. My Grandpa just turned 92 and he still sends me recipes, and we talk about all things baking: crusts, pies, tarts… he is my favorite resource.
When I was a teenager, I called him and asked him if he would teach me how to make his spectacular pies. He obliged and we spent a day in the kitchen together. Everything my Grandpa does is done with precision. He was methodical and specific. He peeled the apples with a small paring knife, the slices were 2mm thick, the flour sifted perfectly. His pies were not glamorous, the tops were often patched up, with perfunctory vents. He used a fork to crimp the edges, then rolled the sides in to prevent the juices from making a mess in the oven. Practicality trumps beauty in his book… which is ironic since my Grandma was just the opposite.
I remember thinking that I would never be able to make them quite as good as he does, and I think that’s true, but I love making them nonetheless. I love this time of year when I can go to the store and load up on apples, and set about baking pies. Gigi is now old enough to (kind of) help me make them. We recently pulled on our aprons and got down to business making Great Grandpa’s Apple Pies. It means so much to me to be making them with Gigi, even if she’s mostly just making a mess.
.jpg) PIN PIN .jpg) PIN PIN.jpg) PIN PIN PINPINPINPIN PINPINPINPIN
GREAT GRANDPA’S APPLE PIE
Ingredients for Pie Crust.
1 1/3 cup cake flour
1 cup all-purpose flour, plus more for rolling surface
1 stick very cold butter, cut into slices
1 tsp fine salt
ice water
Ingredients for Pie Filling.
3 1/2 lbs Granny Smith Apples, once peeled and cored you should have about 2lbs
1 -1 1/3 cup sugar, depending on tartness of apples
1/4 cup lemon juice, freshly squeezed
1 tsp ground nutmeg
1-2 tsp ground cinnamon, depending on how much spice you prefer
1 tbsp butter
2 tbsp all-purpose flour
1 tbsp milk
Directions.
First, peel and core the apples, then set them aside in a large bowl of water to keep them from browning.
To make the crust, place the cake flour, all-purpose flour, and salt in a food processor. Pulse to combine. Scatter in the slices of butter, then pulse again until the butter is well combined. Slowly, with the food processor running, drizzle in the ice water. You want to take your time adding a little water at a time until the dough just forms a ball. Transfer the dough to a ziploc bag and set in the fridge while you slice the apples.
Drain the water from the bowl holding the apples. Using a 2mm or 4mm blade (the standard size that comes with most food processors is 4mm) slice all of the apples, in batches if necessary. Return the apples to the large bowl, toss with the lemon juice.
Preheat your oven to 450º F.
Sprinkle 1 teaspoon of sugar into the bottom of your pie dish. Remove your dough from the fridge. Separate 1/3 of the dough and put it back in the bag, and set aside. Working with 2/3 of the dough, roll it into a ball, on a well floured surface, roll out the dough until it will fit your pie pan, or it reaches your desired thickness. I prefer mine really thin. Transfer the bottom crust to your pie dish. Use a fork to poke a few holes in the bottom pie crust.
Start assembling your pie filling by evenly distributing the following in layers:
2/3 cup sugar
1/3 of the nutmeg and cinnamon
sift
1 tbsp flour to cover the cinnamon
1/2 of the sliced apples, take your time and pack them in as tightly as you can
1/3 cup sugar
1/3 of the nutmeg and cinnamon
sift 1 tbsp flour to cover the cinnamon
the rest of the apples
the rest of the nutmeg and cinnamon
dot with 1 tbsp butter
Form the remaining 1/3 of your pie dough into a ball. Working on a floured surface, roll out the top crust.
Using your fingertip, dab milk around the outside rim of the bottom pie crust before transferring the top crust to the pie. Press to seal the edges, trim the excess crust, and use a fork or crimp to finish the edges.
Use a sharp knife to cut vents in the top crust, creating whatever kid of design you like.
Place the pie on a baking sheet bake in the center of the oven at 450ºF for 15 mins, reduce heat to 350ºF for another 25-35mins, until the apples have no resistance when a skewer is inserted through one of the air vents.
Transfer the pie to a wire rack, allow it to cool for 1 hour before serving it with vanilla ice cream, or fresh whipped cream.
PRINTABLE RECIPE.
GREAT GRANDPA’S APPLE PIE
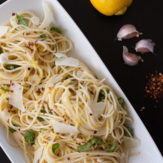
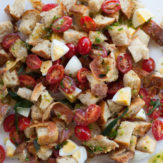
This is a recipe I make all the time. It’s incredibly easy and it really features the green beans. It leaves them with a bit of crunch, allowing their flavor to come through. Accompanied with thinly sliced garlic, these vibrant green beans are a great side dish.
PIN
GARLIC GREEN BEANS
Ingredients.
1/2 lb green beans, trimmed
1 clove garlic, peeled and very thinly sliced
1/2 tablespoon butter
1/2 tablespoon extra virgin olive oil
kosher salt
freshly ground black pepper
Directions.
Prepare a bath of ice water. Bring salted water to a boil. Reduce to a simmer and toss in the green beans. Cook them for 2-3 minutes, until they are vibrant and slightly cooked. Them drain them and immediately submerge them in the ice water to stop them from cooking further. One they are cooled, drain them.
In a large pan heat the butter and olive oil over medium heat. When the butter and oil are melted add the garlic, remove the pan from the direct heat and swirl the garlic slices gently for about a minute, until they are fragrant. Return the pan to the heat and add in the green beans, stirring and tossing continuously until they are heated through. Transfer to a serving dish, season with salt and pepper.
Provides 4 side servings.
PRINTABLE RECIPE.
GARLIC GREEN BEANS
I love mashed potatoes as a side, and I really love roasted garlic. It seems to seep its’ way into many of my dishes. So many of my recipes begin with, “roast a head of garlic” and this one is no different. The roasted garlic adds a huge depth of flavor to these slightly tart, rich mashed potatoes.
PIN
ROASTED GARLIC MASHED POTATOES
Ingredients.
12 medium yukon gold potatoes (about 4 lbs), peeled and quartered
two heads of garlic
3/4 cup heavy cream
2 tablespoons butter
1/3 cup sour cream
1/3 cup Parmesan cheese
3 oz chèvre goat cheese
extra virgin olive oil
kosher salt
1/2 teaspoon freshly ground black pepper
Directions.
Preheat your oven to 400ºF. Slice the top 1/3 of your heads of garlic, exposing the tops of the cloves. Place each head (exposed cloves up) on a double thick square of aluminum foil. Pour 1/4 cup olive oil over each head, sprinkle with a pinch of salt. Seal the heads into two separate foil pouches and set them on a small baking sheet. Roast in the oven for about 45 minutes, until the cloves are soft when you press on them. Set them aside and allow them to cool.
Place your potatoes in a large pot of cold, salted water, and bring to a boil. Reduce to a simmer and cook the potatoes for 15-20 minutes, until they can be easily pierced with a fork.
Meanwhile put the heavy cream, butter, Parmesan, sour cream, chèvre, 1 teaspoon kosher salt, and black pepper into a large stand mixer bowl. Gently remove all the cloves of garlic, add half to the bowl along with half of the olive oil that was used to roast the heads, reserving the other half of the cloves and oil for later.
Drain the potatoes and add them to the bowl. Immediately mash them using the paddle, until they are smooth and have incorporated all other ingredients in the bowl. Remove the bowl from the mixer and gently mix in the remaining garlic cloves. Season to taste. Transfer to a serving bowl and drizzle the remaining garlic olive oil on top. Enjoy.
Provides 8-10 side servings.
PRINTABLE RECIPE.
ROASTED GARLIC MASHED POTATOES
This recipe is adapted from one we found years ago on Epicurious via Bon Appétit. We’ve tweaked it here and there, adapted it to make 1 1/2 times the original recipe. This was the first stuffing recipe I ever made and it’s so good we’ve never bothered to make any other. I dream about the stuff all year, it’s absolutely delicious.
PIN
For a recipe with this many ingredients, I like to prep everything ahead of time which makes the cooking process fun and easy when I’m ready to start.
SOURDOUGH STUFFING WITH PINE NUTS, DRIED CRANBERRIES, AND PARMESAN
Ingredients.
3 14.5oz loaves of soft (cheap) sourdough bread, cut into 1” cubes
1/2 cup extra virgin olive oil, plus more for greasing
2 cups grated Parmesan cheese
2 cups shredded or shaved Parmesan cheese
1/2 cup (1 stick) butter, plus more for greasing
3 very large red onions or 4 medium red onions, coarsely chopped
6 stalks celery, coarsely chopped (about 5 cups)
3 bell peppers (1 red, 1 orange, 1 yellow if possible), coarsely chopped
12 garlic cloves, minced
2 tablespoons minced fresh rosemary
2 tablespoons dried oregano
1 1/4 cup dried cranberries
1 1/4 cup toasted pine nuts
6 large eggs, beaten
1 1/2 cup fresh basil, thinly sliced
1 1/2 low sodium turkey, chicken, or vegetable broth
Directions.
Preheat the oven to 400ºF. Use a paper towel and a couple tablespoons of olive oil to grease to large, rimmed baking sheets. In a very large bowl place 1/2 of the bread, olive oil, and 1/2 cup of the Parmesan cheese. Toss it all together and transfer it to one of the baking sheets. Spread the bread out into a single layer. Repeat with the remaining bread.
Place the baking sheets in the oven for 5 minutes. Remove from the oven, toss the bread around, and place them back in the oven (rotating the pans from top to bottom) for an additional 5-7 minutes, until the bread is golden and toasted. Remove the sheets from the oven, set aside and allow the bread to cool before transferring it back to your bowl.
Melt the stick of butter in a large dutch oven or heavy pot over medium high heat. Sauté the onions, celery, and bell peppers for about 15 minutes, until they are just beginning to brown. Add the garlic, rosemary, and oregano and stir, cooking for about 3 minutes. Turn off the heat and stir in the pine nuts and dried cranberries.
In your large bowl (you may need to use two) mix together the vegetables and the bread. Allow it to cool and rest for about 30 minutes, tossing it occasionally before mixing in 1/2 of your basil and the remaining Parmesan cheese. Finally, once it’s mostly cooled, mix in your eggs (you don’t want to mix them in when it’s hot or they could scramble).
Using butter, grease one very large baking dish/aluminum roasting pan, or two 13×9” dishes. Transfer the stuffing to the pan(s). Moisten with your broth, cover with buttered aluminum foil, and bake until heated through, about 40 minutes.* Uncover and bake until the top is golden, another 20-25 minutes. Sprinkle with the remaining basil and serve!
*When I’m bringing this dish to someone else’s house for Thanksgiving I will stop it at this point and reheat it in their oven covered for 10 minutes, then uncovered for 20 minutes.
PRINTABLE RECIPE.
SOURDOUGH STUFFING WITH PINE NUTS, DRIED CRANBERRIES, and PARMESAN
I thought I’d start by sharing my Brined and Roasted Thanksgiving Turkey Recipe so that, if you decide to use it, you have plenty of time to familiarize yourself with the recipe and gather your ingredients. We’ve been making our turkey this way for 7 or 8 years. We brine it the night before (which usually involves me cringing as Kyle pulls the neck, gizzards, etc. from the vast cavity, some antics getting the turkey situated in the bag, and a small argument over the best way to get the bird fully submerged in the brine). The turkey is rubbed down with a slurry of roasted garlic, butter and herbs, then it’s doused with champagne and apple cider before it goes into the oven. We learned the roasting technique we use from this Alton Brown “Cooking Class” in Bon Appétit. It’s a great resource. Here’s our approach…
PIN
THAWING YOUR TURKEY…
I prefer to thaw my turkey in the refrigerator because I’m a little paranoid about the cold water thawing methods. To thaw your turkey in the fridge, you place the wrapped bird, breast side up in the fridge on a tray (in case it leaks). I actually put a crummy kitchen towel under the turkey in the tray to absorb some of the moisture and any juices that leak out. You have to allow for one day for every four pounds (a 20lb turkey would need at least five days to thaw completely).
BRINING YOUR TURKEY…
One your turkey is thawed completely, unwrap it, remove the liver, gizzards, and heart and discard (or save for gravy if you prefer).
Ingredients.
2 gallons cold water
1 lb kosher salt
1 cup packed light brown sugar
2 tablespoons whole peppercorns
6 large bay leaves
6 sprigs fresh rosemary
Directions.
Stir all the ingredients together in a large pot until the salt and sugar are completely dissolved. Place one large garbage bag inside another one, and set them in a large roasting pan or very large bowl. Place the turkey into the bags, breast side down. Pour the brine over the turkey and press the bird to ensure it’s fully submerged in the brine. Carefully squeeze as much air out of the bags as you can before sealing them. Refrigerate the brined turkey for 18-20 hours. We usually put the turkey in to brine the evening before we’re going to cook it.
Once the turkey is done brining, discard the brine, rinse the turkey and pat it dry with paper towels.
Place a roasting rack, or make a rack with a long coil out of aluminum foil in your roasting pan so the bird is raised a bit off of the bottom of the pan. Place your turkey, breast side up, in a the roasting pan.
Move your oven rack to the next to lowest setting and preheat your oven to 500ºF.
Now you’re ready to prepare your turkey for the oven.
BRINED AND ROASTED THANKSGIVING TURKEY
PREPARING YOUR TURKEY…
Ingredients.
2 heads of roasted garlic (directions below)
3 sticks unsalted butter, softened
garlic powder
onion powder
kosher salt
freshly ground black pepper
1 tablespoon fresh thyme, minced
1 tablespoon fresh rosemary, minced
1/4 teaspoon nutmeg
paprika
1 bottle of inexpensive champagne
two cups apple cider
1/2 medium yellow onion, roughly chopped
1 small apple, roughly chopped
1 celery stock, roughly chopped
kitchen twine
heavy duty aluminum foil for making breast plates
Directions.
I begin first thing on Thanksgiving morning roasting four heads of garlic, two for the turkey and two for the mashed potatoes. (The garlic for the mashed potatoes is prepared a little differently before roasting so be sure to read the recipe here).
To roast the garlic for the turkey. Preheat your oven to 400ºF. Slice the top 1/3 of your heads of garlic, exposing the tops of the cloves. Place each head (exposed cloves up) on a square of aluminum foil. Pour a couple tablespoons of olive oil over each head, sprinkle with a pinch of salt. Seal the heads into two separate foil pouches and set them on a small baking sheet. Roast in the oven for about 45 minutes, until the cloves are soft when you press on them. Set them aside and allow them to cool.
Once you are ready to prepare your bird, remove the cloves from the garlic and place them in a bowl along with the softened butter, thyme, rosemary, and a 1/4 teaspoon nutmeg, blend with a fork until well incorporated and set it near your work station.
Using your hands, gently rub about 1/3 of the herb butter under the skin, directly onto the breast meat. Then spread the rest of the butter all over the bird, including inside the cavity.
Season the bird with plenty of freshly ground black pepper, a little bit of kosher salt (you don’t need too much since the turkey was brined!) and a little bit of paprika. Tuck the wings under the bird and tie the legs together using kitchen twine.
Fill the cavity loosely with the apple, onion, celery, and a generous sprinkle of both the onion and garlic powder. Scatter any extra aromatics in the pan around the turkey. Finally, pour the bottle of champagne and the apple cider over the turkey (it won’t wash off any of your butter because by this time the butter has chilled against the cold turkey).
ROASTING YOUR TURKEY…
Directions.
Place your turkey in a 500ºF oven and roast for 30-40 minutes (you want the breast to be nicely browned but 40 minutes is the maximum time you should roast it at 500º) rotating the turkey 180º after the first 15 minutes). Make two breastplates out of aluminum foil large (to make a breastplate take two layers of heavy duty aluminum foil, shiny side up, large enough to completely cover the breasts and wings).
Remove the turkey from the oven, reduce the heat to 350ºF, baste the turkey (this is the only time you’ll baste the turkey), and apply a breastplate. Insert a probe thermometer, preferably one with a digital thermometer that sits outside the oven, directly through the foil, into the deepest part of the breast. Set the thermometer to go off when the deep breast meat reaches 161ºF.*. Do not open the oven, do not baste the turkey! Just leave it alone!
Once the turkey reaches 161ºF remove it from the oven, double check the temperature in both breasts, and check that the temperature in the dark meat is at least 180ºF. Transfer it to a cutting board, cover it loosely with foil and let it rest for 30 minutes while you finish off your stuffing, bread, or other dishes that need a little oven time.
*We often get nervous and leave the bird to reach 165ºF before roasting but according to experts 161º is the perfect temp to pull it as the temperature will continue to rise after it’s pulled from the oven.
After it’s rested for thirty minutes, carve your turkey, serve and enjoy.
**Because the turkey was brined, the drippings are too salty to use straight for gravy so I usually cut them with a bit of low sodium turkey or chicken broth. Added to a basic roux, this makes a simple, delicious gravy.
PRINTABLE RECIPE.
BRINED and ROASTED THANKSGIVING TURKEY
|


.png)